 CloudConverter
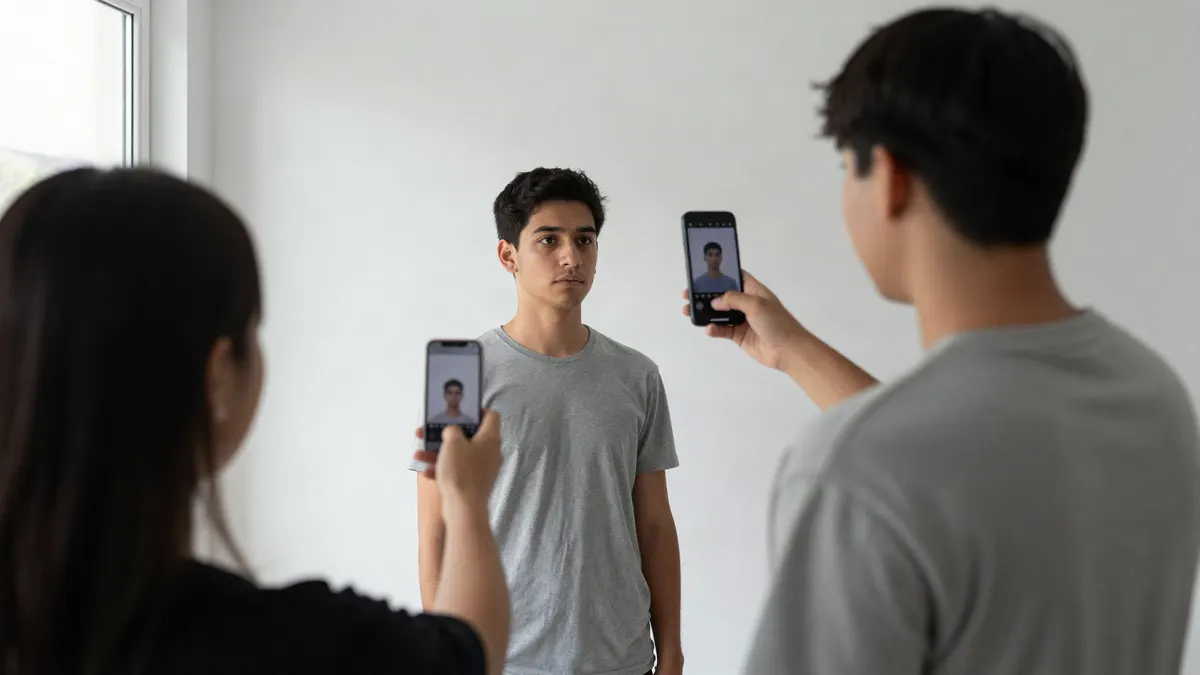
The DS-160 is long. You get through the travel history, the family details, the security questions, and then right near the end it asks for a photo. Upload a normal picture from your phone and there's a good chance it bounces straight back.
Loads of people end up paying the photo shop next to the embassy, and if you're short on time, fair enough. But it isn't hard to do at home: you need a bare wall, some daylight and somebody who'll hold your phone for thirty seconds. After that it's just file stuff. Square, 600 × 600 pixels, 240 KB max.
Here's how I'd do it, plus what my own test files actually came out at.
The numbers, straight from the State Department
Most of the confusion comes from mixing up the printed photo and the digital one. They're the same picture in two forms:
| Rule | Digital photo (DS-160, DV Lottery) | Printed photo |
|---|---|---|
| Size | Square, 600 × 600 up to 1200 × 1200 pixels | 2 × 2 inches (51 × 51 mm) |
| File | JPEG, 240 KB or less, colour (sRGB) | Printed on photo paper |
| Head | 50–69% of the image height | 1 to 1 3/8 inches, chin to top of head |
| Eyes | 56–69% of the height, measured from the bottom | 1 1/8 to 1 3/8 inches from the bottom |
| Age of photo | Taken in the last 6 months | |
Then there's the stuff about you. White or off-white behind you, look straight at the lens, no smile, eyes open, no glasses. A hat or scarf is only OK for religious or medical reasons and even then the whole face has to be visible. It's all written out on the State Department's photo page. They tweak it every so often, so I'd give it a glance.
Step 1: Take the photo (the bit people rush)
Resizing is easy. Most of the problems are in the picture itself, so spend your five minutes here.
- Pick the wall. Plain white or off-white with nothing on it. Light grey sometimes works, patterned paint never does.
- Stand away from it. About a metre, or a bit more. Pressed up against the wall, you'll throw a shadow behind your head, and that shadow is one of the classic reasons a photo gets turned down.
- Face a window. Daylight coming at you from the front gives soft, even light across both cheeks. A lamp from the side makes one half of your face darker, and that's a problem too.
- Let someone else hold the phone. Selfies are too close, and a phone at arm's length makes your nose look bigger and your ears smaller. Have a friend stand 1 to 1.5 metres away with the phone at your eye level.
- Leave room. Your whole head, a bit of space above your hair and the tops of your shoulders should all be in the shot. Cropping comes later, and you can cut stuff out but you can't magic it back in.
- Lose the glasses. Since 2016 they aren't allowed at all unless a doctor signs a statement saying you can't take them off.
Keep your face still and normal. Not a smile, not a frown. Just the face you'd make waiting for a bus.
Step 2: Crop it square, with your head the right size
This is the mistake I made in my own test. I cropped a square tight around the face, because that felt like "a passport photo". Then I measured it.
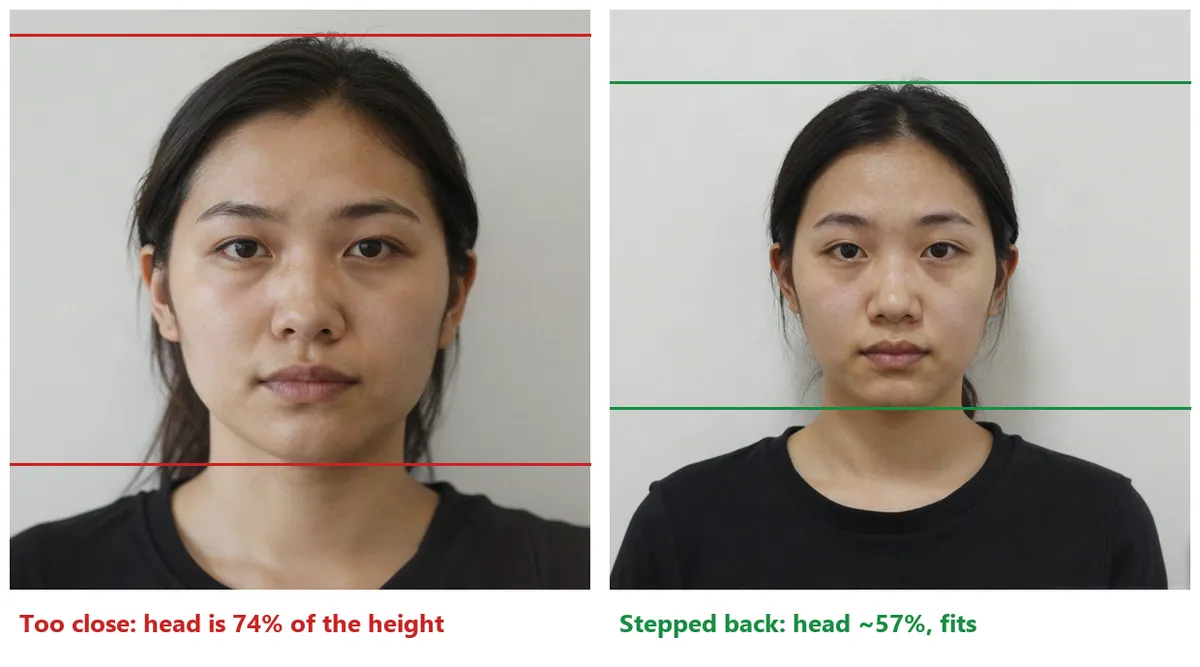
On the left, the head runs from the top of the hair to the chin across 74% of the picture. The limit is 69%, so that one fails, and it would fail even though everything else about it is fine. On the right I simply used a photo taken from further back. Head's now about 56–57% of the height, eyes about 59% up from the bottom. Inside both limits with a bit to spare.
No ruler? On a 600-pixel photo, the head wants to be somewhere between 300 and 414 pixels tall. Hair brushing the top edge or chin sitting low near the bottom means you're too close. If there's a lot of empty wall around a small face, it's too small.
Avoid "fixing" a tight crop by stretching the wall or painting in more background with an app. The rules allow cropping and resizing, but anything that changes the image itself can get it rejected. If the framing is wrong, retake the photo. It only takes a minute.
Step 3: Get the file to 600 × 600 and under 240 KB
The easiest way is our US Passport & Visa Photo tool. Choose the picture (HEIC straight off an iPhone is fine), tap the DS-160 / DV Lottery preset and look at the preview before downloading. You get a 600 × 600 JPG back, cropped square, saved as sharp as it can be while staying under 240 KB. There's also a printed 2 × 2 inch preset if you need paper copies for a passport application.
The State Department also has its own photo cropping tool on its website, and it's fine too. It crops the square for you; just check the file size of what it saves before you upload.
If you'd rather do it yourself in an editor, here's what to know about the size limit. I saved the same correctly framed portrait as a JPEG at different quality settings:
| JPEG quality | 600 × 600 | 1200 × 1200 |
|---|---|---|
| 100 | 186 KB | 733 KB ❌ |
| 95 | 68 KB | 261 KB ❌ |
| 90 | 43 KB | 158 KB |
| 85 | 32 KB | 114 KB |
| 80 | 26 KB | 91 KB |
Two things jump out. First, at 600 × 600 the file is under the limit at every quality setting, even 100. So if your 600-pixel photo is somehow coming out bigger than 240 KB, the size probably isn't 600 × 600 at all, or it's been saved as a PNG; the same picture as a PNG was 421 KB. Second, the maximum size of 1200 × 1200 only fits once you drop the quality to around 90. For a form that shows the photo at thumbnail size, 600 × 600 is the safer pick and looks just as good.
One honest caveat: my test portrait is clean, with smooth light. A darker indoor phone photo has more grain, and grain makes JPEG files bigger. Expect your numbers to come out somewhat higher than mine, though at 600 × 600 there's still plenty of room.
For comparison, the original straight off a phone camera is usually 1 to 4 MB. No wonder the form spits it out.
Still getting rejected? Here's what's usually going on
- "Photo does not meet requirements" right after upload. Nine times out of ten it's the file: not square, smaller than 600 pixels, or bigger than 240 KB. Look at the details. Windows: right-click, Properties, Details tab. Mac: open in Preview, ⌘I.
- Upload works, then the face check moans. Head too big or too small (see Step 2), face turned slightly, or eyes not clearly open.
- Background problems. A shadow behind the head, an off-colour wall, or a light switch or picture frame creeping into the corner.
- The file won't even open. iPhones save photos as HEIC, and some forms only take JPG. Convert it first with HEIC to JPG, or just run it through the visa photo tool, which outputs a JPG anyway.
- Colour is off. Black and white photos aren't accepted, and neither are heavily filtered ones. Turn off the beauty mode on your camera before you take the picture.
One thing that catches people out. The online check passing doesn't mean you're done. The officer at the interview can still look at it and ask for another one, so the light and framing matter more than squeezing out a few KB.
Do you need a printed photo as well?
For the DS-160 itself, the upload is usually all you need. Some embassies and consulates still ask you to bring a printed 2 × 2 inch photo to the interview, though, and paper US passport applications (the DS-11 in person, the DS-82 by mail) need printed photos. Check your embassy's page before your appointment. If you need prints, use the printed preset, then print the JPG at exactly 2 × 2 inches, not "fit to page". Most photo kiosks and print shops will do that for very little.
The short checklist
- Plain white wall, stand a metre away, face a window.
- Friend takes the photo at eye level, no glasses, neutral face.
- Square crop, head roughly half to two thirds of the height.
- JPG, 600 × 600. Should be miles under 240 KB.
- Check the file's properties before you upload.
That's really all there is to it. If your photo is just too big for another form that isn't US-specific, the guide on reducing a photo to 100 KB covers that side of things in more detail.